People sometimes ask me, “Pardon me, fine sir, but I am most impressed with your pixelated glitch work. How does an individual achieve such a desirable aesthetic?”
It’s a very good question, old bean. While there are no doubt vastly superior and more detailed tutorials on the subject floating around the Galactic Network I thought I’d take the time to outline the method I currently use to create various pixel-related effects. I’m not the best at explaining things, but bear with me and you might just learn something!
**Click the photos to see full size!**
For this experiment I shall be using another photo of an adorable animal; for continuity purposes, of course.
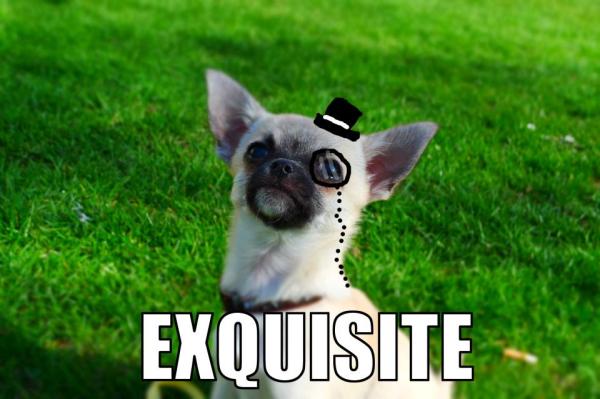
Meet Cobra!
He’s my friend’s dog and an outstanding little chap! He also rocks a monocle.
But let’s crack on.
Aside from painstakingly applying each pixel by hand, one at a time (which I’m sure some extremely talented people actually do) there is one quick and easy way to pixelate an image. I am working in Photoshop CS3 again for this but you may well be able to use this technique in GIMP, or other image manipulation software.
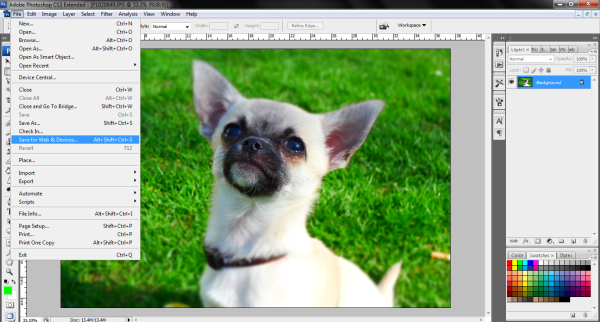
Once you’ve opened up your image in Photoshop you go to File>Save for Web & Devices…
Or, alternatively, you can press Alt+Shirt+Ctrl+S.
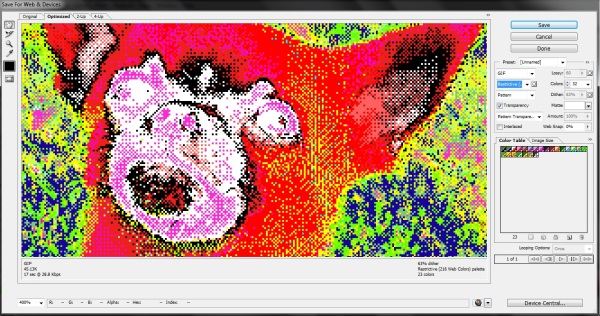
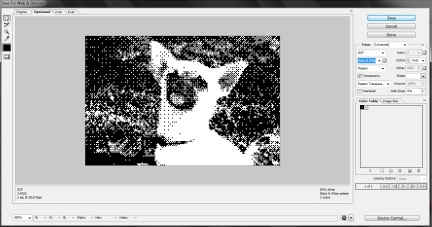
This will bring up the Save for Web & Devices dialog box. If you’ve ever made a GIF in Photoshop before then you’ll be familiar with this already. There are a variety of settings, but at the moment it doesn’t look too different from the original does it? If I zoom in however…
…then you can see that it has in fact pixelated Cobra’s eye! But at full size the image looks no different. That’s because this image is as it was when it first came off the memory card. It’s still at full size. I’ve pixelated the image, but there are a LOT of pixels to work with. Let’s cut that down.
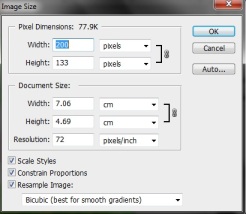
I’ve cut the pixels per inch down to 72 and the width down to 500. For web, this would be an *alright* size. For quality, it doesn’t matter too much how small you make it. But the size of the image does have an important impact on your outcome – I’ll come to that later on. For now, let’s open the Save for Web & Devices dialog box again.
Okay! Now we’re getting somewhere!
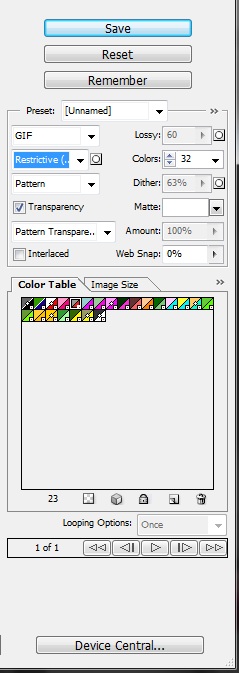
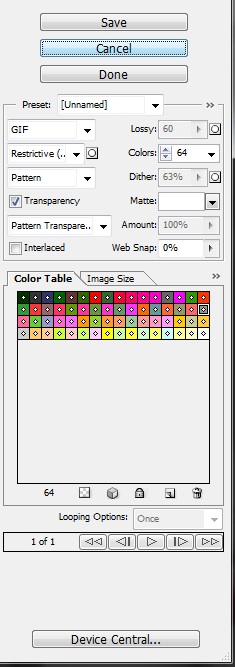
Take your eyes off the dog for a second and look at the settings on the right. In the first dropdown box you can see what the image will be saved as. I always leave it as a GIF, just because it works, but I think a PNG would do just as well.
Underneath that you have the Colour Reduction Algorithm. Basically, it’s just a selection of different way that Photoshop will manage the colours. Here it’s set to Restrictive (Web), and across from that you can see how many colours it has to work with. Right now it’s 64. Let’s cut that in half.
You can see that’s made a difference, but not a hell of a lot. What this gives us a chance to do though is to move past the rest of the settings for the moment and look at the Colour Table. Here you can see all of the colours being used to compose the image. And the best part? You can change all of these just by double clicking on them and selecting a new colour.
See how I’ve changed one of the lighter colours to red, and one of the greens to blue? All of the pixels that use that colour have been changed in the image. You can either use this to might certain colours brighter or darker, or just to mess with the colour scheme entirely!
When you change a colour the icon for it splits in two. The top left half is what the colour originally was. The bottom left half shows what you’ve changed it to. If you’ve made a mistake and want to revert a colour you can just double click the icon. The selector will return to the location of the original colour and all you have to do is click OK.
Alternatively, if you want to reset ALL the colours then hold the ALT key and press the Reset button.
You can also press the Remember button to make Photoshop remember your colour settings. I know, I know. If I hadn’t have told you you’d never have guessed.
“But wait,” I hear you ask, “What if I don’t want it to be in colour and just what a black and white pixel image?”
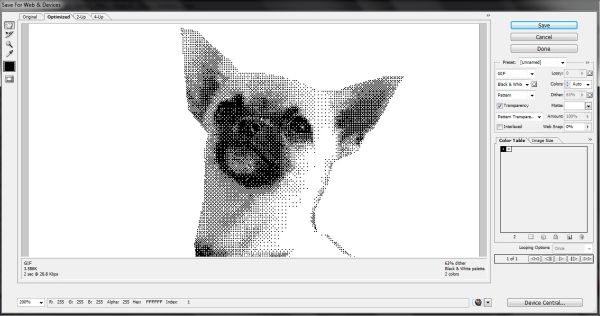
Good question, amigo. Well, do you remember when I showed you the colour reduction algorithm? How the drop down menu is set to Restrictive? Give that a click and select Black and White.
Boom. Black and white pixels.
It’s basically the same as changing the number of colours to 2, but this way you can quickly flip between the two. Photoshop does its best to differentiate between the colours and shades, but there’s not a lot of difference between the background and Cobra here is there? It all kind of blends together.
You can fix that by either cutting around the subject and removing the background, or you can increase the contrast between the subject and background so it stands out more! The how is up to you, it depends entirely on what you’re doing and how you want it to look.
Right. Now is a good time to talk about something new; The Dither Algorithm. It’s located under the colour reduction algorithm and mine has been set at Pattern. I often use pattern because I prefer the aesthetic but here are the four different settings.
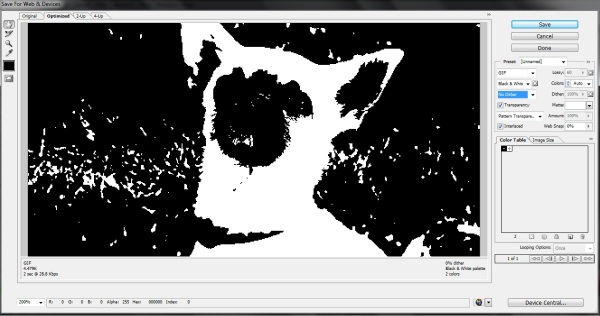
NO DITHER: You’ve turned the dither off. All of it. There’s not even a little left. You ate everything. As a result, Photoshop has done its best to cut the image in to two colours as solidly as it can.
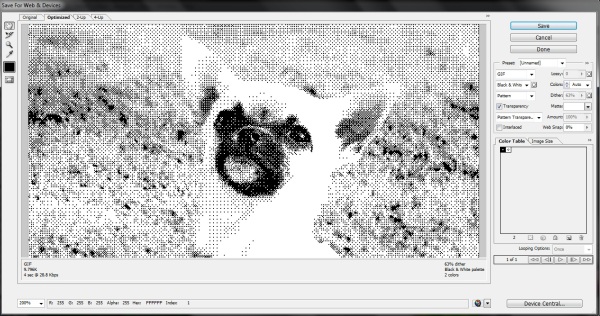
DIFFUSION: On this setting Photoshop seems to try to dither the image as closely to the original image as possible. This is also the only setting where you can decide how much dither you want by using the percentage slider to the right.
The first image is at 100% dither while the second is at 50%. See how at 50% the image looks about halfway between max dither and just setting it to No Dither? Yeah, that’s right. It works exactly how you’d expect.
PATTERN: You’ve been looking at this one already. Like I said, I prefer it but it’s entirely up to you which setting to use. I just like the…well…the patterns it makes.
NOISE: This one’s a very distorted setting, as you’d expect. I guess you could say that it tries to ‘blur’ the edges but I’m sure you know how noise works by now. If not, you can always just try it out and see for yourself.
For now, I’m going to flip back to Pattern.
You might be sitting there thinking that I’m done. That’s it! You can pixelate things and you can change the colours! Time to go home! Well, you may well be able to do that. You could take what you’ve got now and go explore, but I’ve got a few more tips to throw your way yet.
What if there are too many pixels there? What if you wanted the pixels to be larger, and fewer in number; something a bit more retro looking? This is where the size of the image really makes that difference.
The detectives among you will have realised by now that the smaller you make an image, the fewer pixels there will be for Photoshop to work with. Let me show you.
I’ve made the image much smaller. It’s only 200 pixels wide now, but when I open the Save for Web & Devices dialog again you can really see the difference. But, of course, the image is very small. 200 pixels wide? That’s only about the same size as your Facebook profile picture thumbnail. But trust me, give it a name and save it as a GIF.
————————————————————————————————————————————–
[OBJECTION!] “You don’t need to bother saving it as a GIF! Why are you telling these poor folks to use the Save for Web & Devices dialog when you could just go to Image>Mode>Indexed Colour instead?!”
Ah yes, there is indeed a second method of achieving the effect that you can see that doesn’t involve saving a separate file on your computer. This entire method is a roundabout way of converting the file to Indexed Colour. But, while this other option IS there I prefer to go through the process that I’ve outlined here.
If you go through Image>Mode>Indexed Colour you only get this tiny box to play with. It reflects the changes on your canvas, but there’s no colour table and I find it to be generally less usable. You have to go through Image>Mode>Colour Table in order to change the colour, so why not just do them both at the same time?
————————————————————————————————————————————–
So you’ve saved your GIF? Good. Now open it in Photoshop again. You’ll be faced with just the one layer, your image. It’s only 200 pixels wide but you can zoom in as much as you like and the lines will never change. As long as the colours are indexed it’s like working with a vectored image.
Let’s go and pump this baby up to 800 pixels wide and see what happens.
Oh hey, all that happened was that the image became 800 pixels wide. Brilliant!
But something to note is this. 800 is a multiple of 200, so the square pixels stayed as squares. Let’s see what happens if, instead of making it 800 pixels wide I made it 523 pixels wide.
I’ve zoomed in a bit more for this one so you can see it better. Everything has been slightly elongated because it’s trying to reinterpret the image at that size.
So remember, to keep the image exactly the same when resizing it you need to make sure the new size is at least close to being a multiple of the old size. Otherwise there will be some distortion.
Now, when using Indexed Colour you’ll find that Photoshop doesn’t like allowing layers. One way to combat this is to simply change the colour mode back to RGB/CYMK/Whateveryouwereusingbefore. As long as you don’t change the size of that layer again then the edges of the pixels will remain sharp and crispy.
Because of this resizing thing it means you can convert an image to indexed colour and then slowly shrink it down to see how it looks, until it reaches a state that you like. Personally, I like using this on text to pixel it up.
As you can see, if you make the text smaller it becomes more distorted. I think that’s a very cool effect, and that’s just using one font, so try it for yourself and see what happens!
But for now, I think that’s everything I have to offer on the subject of pixelating images using Photoshop. It can be a great addition to glitch art images, or just used to make some interesting pixel looking stuff. Go wild with it! Break the mould and experiment!
Got more questions? Feel free to drop a line and I’ll get back to you as soon as I can!









nat
/ October 16, 2012hey thanks for this, it has been really cool to “pixel shit” but I’ve got a problem, when I print it the image is too small and if I enlarge it blurs the pixels sharpness. Any ideas on how to print it big and sharp?
Thanks
Howl
/ October 16, 2012If you set the colour profile to Indexed Colour and enlarge the image it shouldn’t depreciate the sharpness of the image. As far as I know it’s as sharp as a vector! The only hazard is that it might warp the pixel’s shape slightly.
So, if you’ve pixelated something and saved it as a .gif, then open it again in photoshop then it should automatically be set as indexed colour! If you then change the image size it should stay nice and sharp.
Also, your email is Natalia Dias! If you’re the Natalia Dias of NataliaDias.com then I love your 2011 gallery! The ceramic hearts especially! :D
Let me know how it goes for you! Thanks for dropping by (:
nat
/ October 17, 2012It worked!! Thank you so much for the tips, you are very good at explaining this stuff,Im slowly grasping a little bit of photoshop, thanks for this brilliant blog Howl, and also for the compliments to my work :) I will be dropping by again!
Howl
/ October 17, 2012You’re very welcome! :D I’m glad you think so! I often think that my sentences and things aren’t very well constructed haha
You should check out my Tumblr blog! questionsomething.tumblr.com
I use it a lot more these days. Pretty much everything I make gets posted there as and when I make it. I just post here from time to time to try and keep it updated >_< …try!
How did you manage to find my little corner of the internet? I'm often curious how people stumble on to my blog/s!